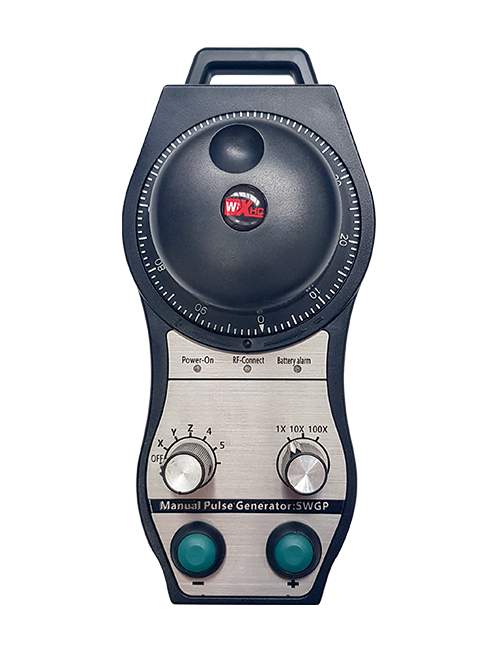
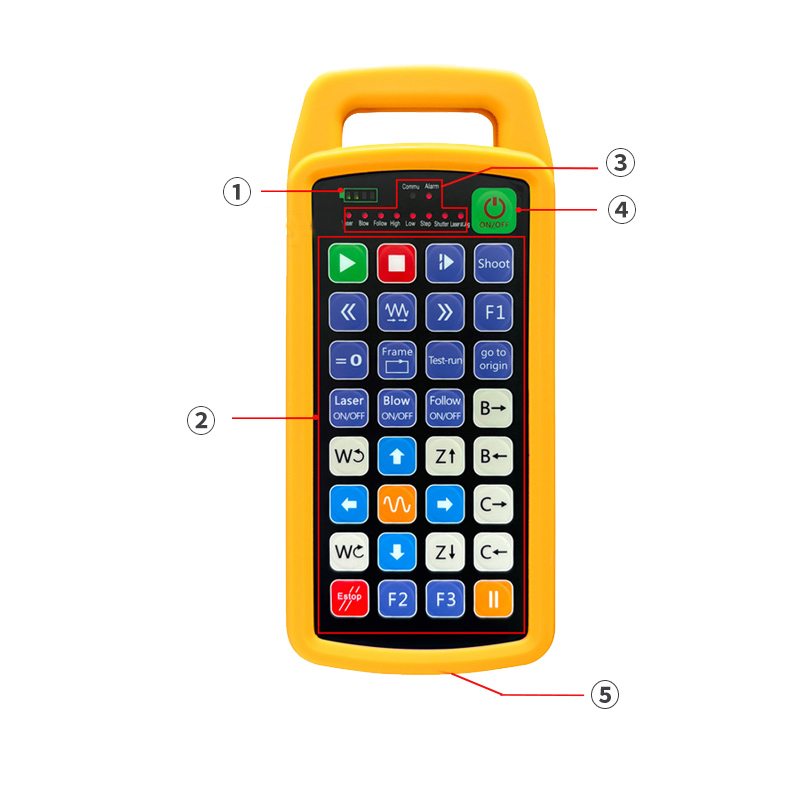
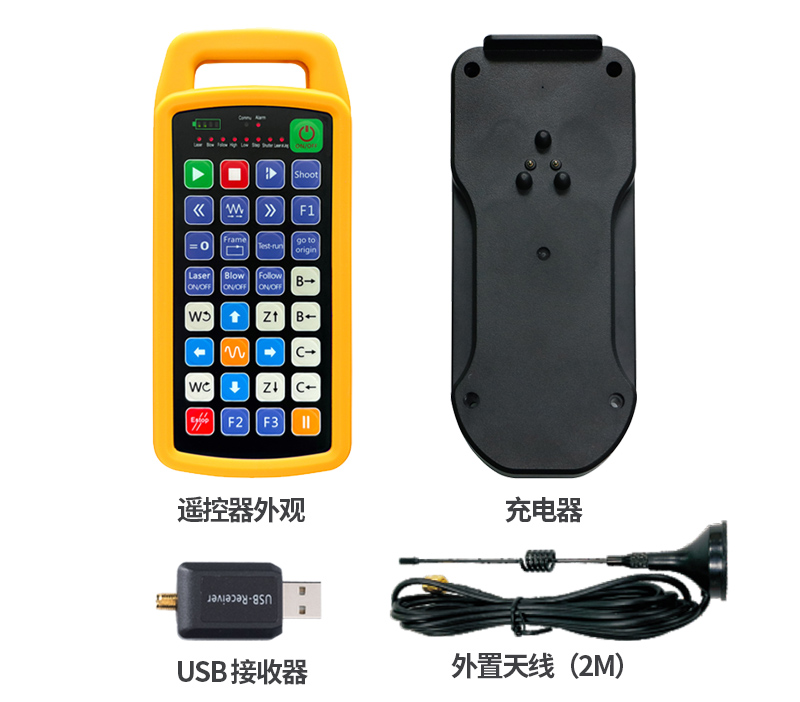
Programmable wireless remote control consists of two parts:Remote control + USB receiver + external antenna + charger
Supports 32 custom button programming
Supports 9 custom LED light display programming
Programmable wireless remote control consists of two parts:Remote control + USB receiver + external antenna + charger
Supports 32 custom button programming
Supports 9 custom LED light display programming
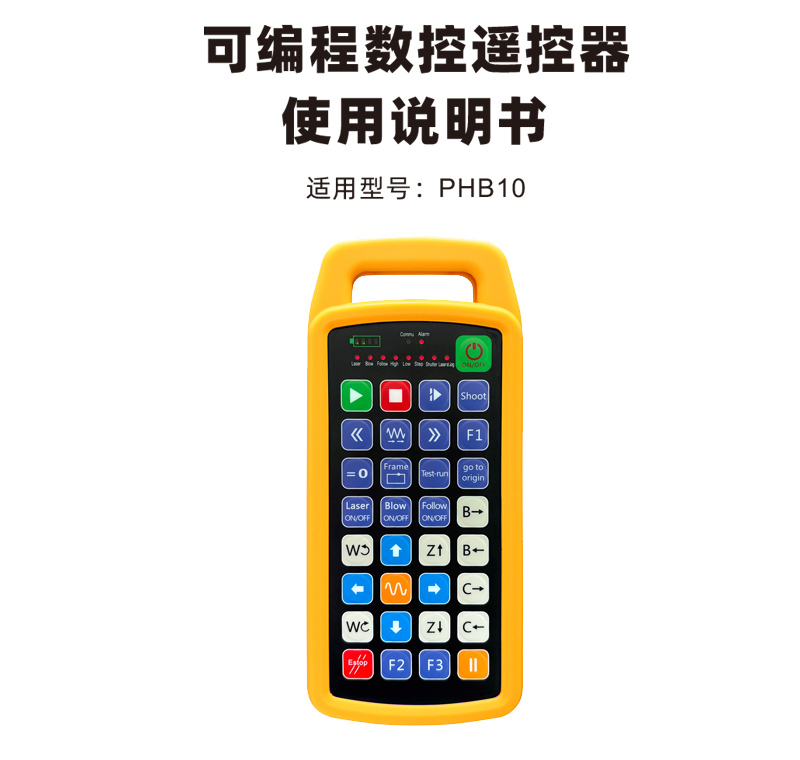

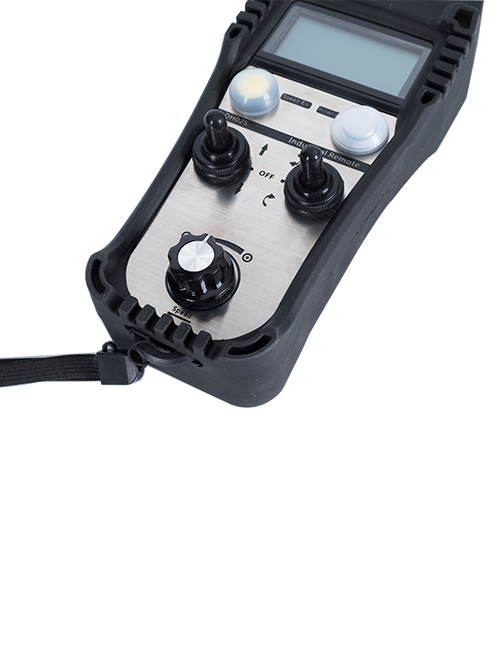
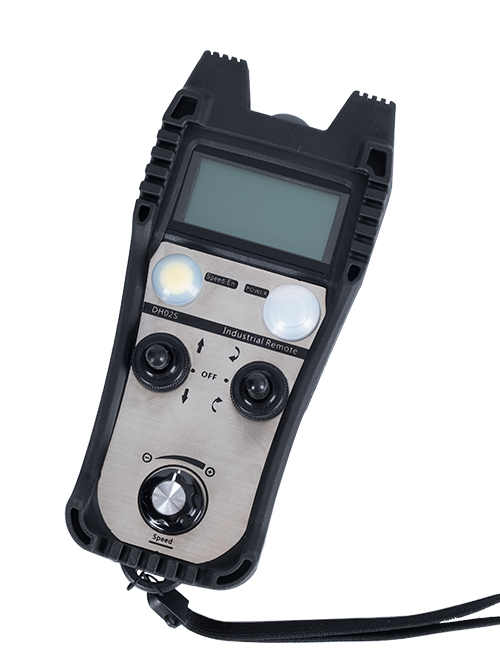
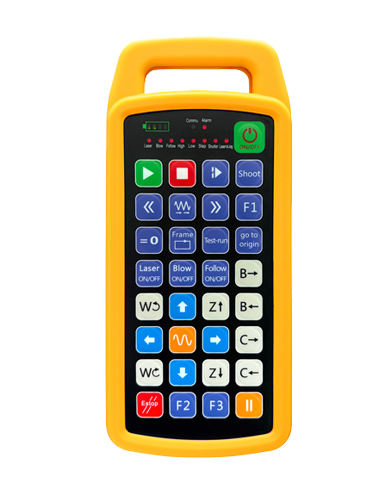
Programmable CNC remote control PHB10 is suitable for wireless remote control operation of various CNC systems,Support user-defined programming to develop button functions,Realize remote control of various functions on the CNC system;Support user-defined programming to develop LED lights to turn on and off,Realize dynamic display of system status;Remote control comes with rechargeable battery, Support Type-C interface charging。

1.Using 433MHZ wireless communication technology,Wireless operating distance 80 meters;
2.Adopt automatic frequency hopping function,Use 32 sets of wireless remote controls at the same time,No effect on each other;
3.Supports 32 custom button programming;
4.Supports 9 custom LED light display programming;
5.Support IPX5 waterproof level;
6.Fixed base charging mode or standard Type-C charging mode;
7.Support real-time display of battery power。

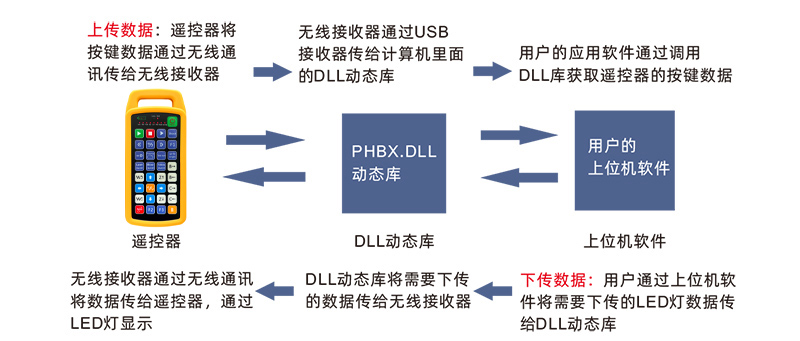
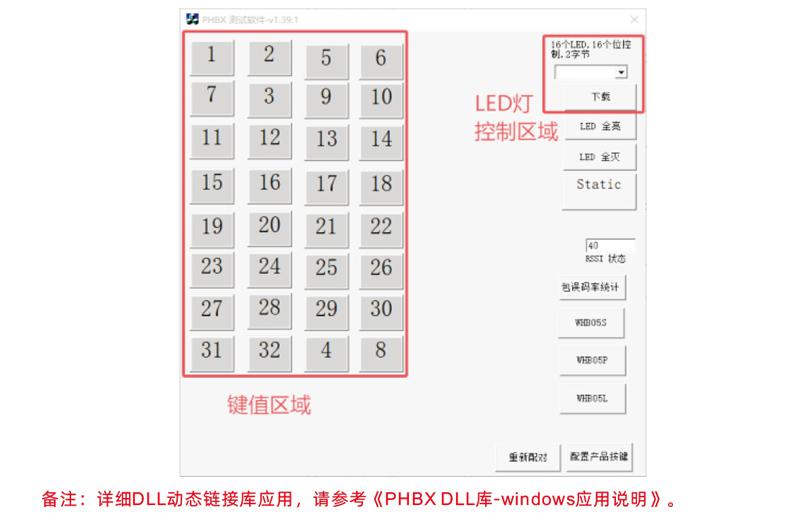
Remark:Detailed DLL dynamic link library application,Please refer to "PHBX DLL Library-windows Application Instructions"。

| Handheld terminal operating voltage and current | 3.7V/7mA |
| Rechargeable battery specifications | 3.7V/14500/1100mAh |
| Handheld terminal low voltage alarm range | <3.35V |
| Handheld terminal transmit power | 15DBM |
| Receiver receiving sensitivity | -100DBM |
| Wireless communication frequency | 433MHZ frequency band |
| Button service life | 15Thousands of times |
| Wireless communication distance | Barrier-free distance 80 meters |
| working temperature | -25℃<X<55℃ |
| Anti-fall height (meters) | 1 |
| receiver port | USB2.0 |
| Number of buttons (number) | 32 |
| Custom LED light quantity (pieces) | 9 |
| Waterproof level | IP67 |
| Product size (mm) | 190*81*26(remote control) |
| Product weight (g) | 265.3(remote control) |


1 .Plug the USB receiver into your computer,The computer will automatically recognize and install the USB device driver,No manual installation required;
2.Remote control plugged into charger,After the battery is fully charged,Press and hold the power button for 3 seconds,Remote control power on,The battery indicator lights up,Indicates successful booting;
3.After booting,Any key operation can be performed。The remote control can support simultaneous operation of two buttons。When any key is pressed,The COMMU light on the remote control will light up,Indicates that this button is valid。

1.Before product development and use,You can use the demo software we provide,Perform button test and LED light test on the remote control,You can also use the demo as a reference routine for future programming development.;
2.Before using Demo software,Please plug the USB receiver into the computer first,Make sure the remote control has sufficient power,Long press the power button to turn on,and then use; When any button on the remote control is pressed,The test software demo will display the corresponding key value,After releasing, the key value display disappears.,Indicates that button upload is normal;
3.You can also select the LED light signal on the test software demo,Click to download,The corresponding light on the remote control lights up,It means the LED light is transmitted normally.。

| Failure situation | Possible reasons | Troubleshooting |
| Long press the power button, The battery light does not light up, Unable to turn on and off | 1.There is no battery installed in the remote control or the battery is installed in the wrong direction. 2.Battery is low 3.Remote control failure |
1.Check the battery installation status of the remote control 2.Charge the remote control 3.Contact the manufacturer and return to the factory for maintenance |
| Plug in the USB receiver, The computer prompts that it cannot be recognized and failed to install the driver. | 1.Computer USB interface depth is inappropriate,Causes poor contact at the socket 2.Receiver USB failure 3.Computer USB is not compatible |
1.Laptop using USB splitter; Desktop computer plugged into the back of the host; 2.Use DEMO software to check whether the USB receiver is working properly 3.Replace a computer for comparison testing |
| Remote control buttons, Software is unresponsive | 1.USB receiver not plugged in 2.The remote control is out of power 3.The remote control and receiver IDs do not match 4.Wireless signal interruption 5.Remote control failure |
1.Plug the USB receiver into the computer 2.Remote control charging 3.Check the labels on the remote control and receiver,Confirm that the ID numbers are consistent 4.Pairing using DEMO software 5.Contact the manufacturer and return to the factory for maintenance |

1.Please keep it at normal temperature and pressure,Use in dry environment,Extend service life;
2.Do not use sharp objects to touch the key area,Extend key life;
3.Please keep the key area clean,Reduce key wear;
4.Avoid damage to the remote control caused by squeezing and falling;
5.Not used for a long time,Please remove the battery,And store the remote control and batteries in a clean and safe place;
6.Pay attention to moisture-proofing when storing and transporting。

1.Please read the instructions carefully before use,Operation by non-professionals is prohibited;
2.Please use the original charger or a charger produced by a regular manufacturer with the same specifications.;
3.Please charge in time,Avoid incorrect operations due to unresponsiveness of the remote control due to insufficient battery power.;
4.Need repair,Please contact the manufacturer,If the damage is caused by self-repair;The manufacturer will not provide warranty。